On this page:
- Overview
- Bike specifications
- How to use the bike racks
- Loading your bike
- Unloading your bike
- Loading and unloading your bike at the Bus Interchange
- Practice rack at the Bus Interchange
All Metro buses used on urban routes are fitted with bike racks, providing you with options to bus to work and bike home, bike and bus in stages or get access to cycle tracks around the city. The bike racks are easy and free to use.
Please note there are a few bike specifications you should be aware of. Please take a look at the specifications section below before carrying your bike on the bike racks.
Bike specifications
Your bike must fit a few specifications to be able to be carried on our racks:
Wheel size: Racks are designed to carry bikes with wheels larger than 16″ in diameter with a maximum tyre width of 3".
Maximum weight: You bike must not weigh more than 25kg.
Electric bikes: Electric bikes can be taken on bike racks, as long as they do not weigh more than 25kg.
Maximum number of bikes per bus rack: All of our Metro buses can carry at least two bikes at the front. Some buses can carry up to three bikes. Bike racks are available on a first-come, first-served basis. If the racks are full, you cannot carry your bike inside the bus.
Foldable scooters: If your scooter folds up then you can take it onboard the bus. You need to make sure it is folded up while onboard and stowed next to you on a seat, under a seat or in a storage rack.
Foldable bikes or scooters that don’t fold: It is the driver's decision at the time of boarding whether it can go onboard or not. This is because scooters that do not fold up can become projectiles and dangerous to other passengers if the bus had to do an emergency stop. If your scooter does not fold up, we recommend you do not take it on the bus.
Damage covers when your bike is on the bike rack: Your bike is covered for damage while on the rack. It is transported and protected on Public Transport in Canterbury under Contract and Commercial Law Act 2017. That means if loss or damage occurs while being carried, you may be able to claim up to a maximum value of $2,000 from the carrier (Public Transport operator).
Bike storage in the CBD: If you need a place to store your bike in the CBD, there is a free bike park in the Bus Interchange.
Taking a bike on a school service: You cannot take a bike on school services, as they are not fitted with bike racks. Occasionally, an urban bus with a bike rack may be used as a substitute bus for a school service, but this is an exception.
For more information on cycling in Christchurch visit the Christchurch City Council website.
How to use bike racks
Using our bike racks is easy.
When the bus arrives, it takes just a few steps to get your bike on the racks.
You can also learn how to put your bike on the bus without any pressure by using the practice bike rack at the Tuam Street end of the Bus Interchange.
Watch this video to see how to use the bike racks.
Loading your bike
- Before the bus arrives remove any loose items from your bike that could fall off while the bus is moving.
- Squeeze the bike rack handle up to release and lower the rack.
- Lift your bike on to the rack with the front wheel facing the support arm.
- Raise the support arm over the front tyre so the hook rests on the top of the wheel.
- The bike is now secure and you can board the bus.
Step by step instructions

Step 1: Squeeze/pull bike rack handle up to release and lower the rack.
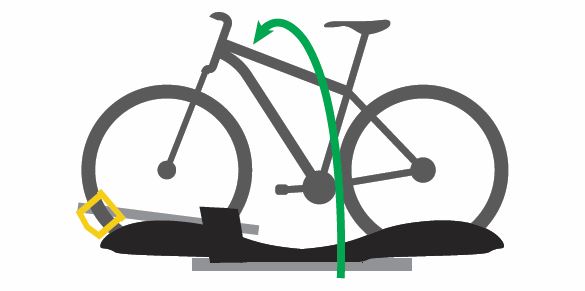
Step 2: Lift bike onto the rack with front-wheel facing towards the support arm.
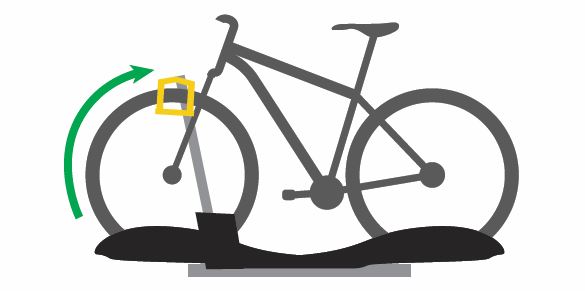
Step 3: Raise the support arm over the front tyre so the hook rests on the front wheel. The bike is now secure and you can board the bus.
Unloading your bike
- Let the driver know you will be unloading your bike when you exit via the front doors.
- Unhook and lower the support arm from the front tyre and lift your bike from the bike rack.
- If no one else is using the rack, squeeze the handle and fold the bike rack up.
Step by step instructions
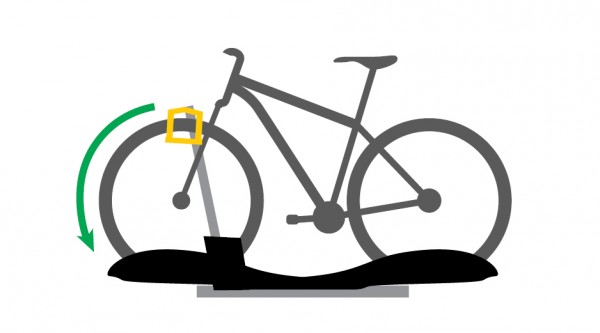
Step 1: Lower support arm
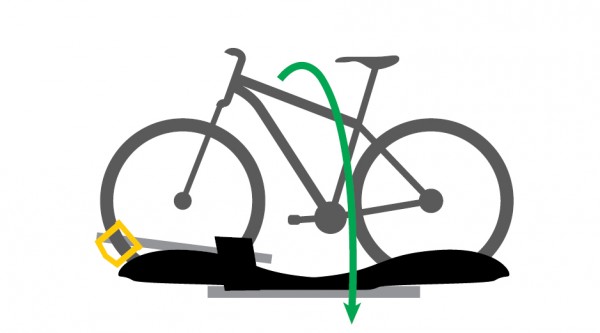
Step 2: Lift bike off the rack.
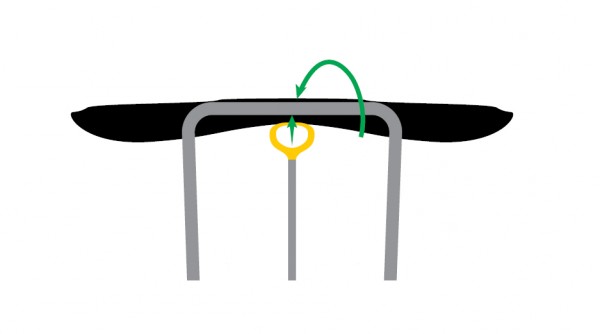
Step 3: Squeeze/pull bike rack handle up.
Loading and unloading your bike at the Bus Interchange
At the Bus Interchange, all bays have separate bike doors to access the bike racks in front of the bus so you are able to load and unload your bike undercover.
Practice rack at the Bus Interchange
You can also learn how to put your bike on the bus without any pressure by using the practice bike rack at the Tuam Street end of the Bus Interchange.
